Print Guide
Preparing and sending your image file for printing
Managing colors
For best printing results, it is necessary to prepare your digital files following our guide and our suggestions. Our workflow is managed completely by the standars of Colour Management. All monitors, scanners, printers are calibrated regularly. There is an overall 5000K color temperature lighting in our studio providing color-accurate environment.
The essential point in preparation is working with a calibrated monitor. Use an external device (colorimeter) and suitable software for calibrating the monitor. The new monitor profile will be copied to the operating system by the software, so all graphical applications will show right colours throgh your monitor's profile. Make sure you do not change - even accidentally - the monitor's controls and settings after calibration! It is recommended to renew the calibration at regular intervals, at least in every six months.
Choose a system profile for your work. We advise using one of the following standard RGB colour profiles to your photographic workflow:
âĒ Adobe RGB 1998
âĒ ProPhoto RGB
âĒ sRGB (in special cases only as sRGB gamut is limited)
Set the selected standard RGB profile as default in your photo applications and always include this profile when saving your image file!
Download the ICC profiles for soft-proofing within media details at printing page.
Never save these media profiles to your image file!
Always save backup copies of your original images (e.g. RAW, TIF) and the layered files (TIF, PSD). Don't use data compression like JPG, use lossless methods like TIF with LZW compression instead.
Manage your pictures in their own standard gamut (RGB system profile), do not convert the images to CMYK nor assign other profile, unless you have specific reasons to do that.
Resolution
Always set the resolution in print size: ppi (pixel per inch) the width or length of your image divided by the number of pixels
âĒ 200-300 dpi below 0,5 m2
âĒ 150-300 dpi between 0,5 m2 and 1 m2
âĒ 100-200 dpi over 1 m2
âĒ 100-200 dpi for canvas prints depending the print size
Sharpening
Sharpening the image for the print size in Adobe Photoshop:
âĒ set to view the real printing size on your monitor (this is not the 1:1 size, because that's for 72 dpi)
âĒ use the ruler tool (Ctrl+R) to show the real size in cm, mm or inches at the sides of the screen
âĒ sharpen with the Unsharp Mask tool viewing your picture in real size, select smaller pixel radius and higher sharpening amount in %.
âĒ (e.g. Printing size: 60x80cm - Unsharp Mask amount: 100%, radius: 0,5-0,7 pixels)
File format:
âĒ We propose using TIF with LZW lossless compression for bitmaps
âĒ You can use either 8 bit or 16 bit color depth both printed at the highest quality
âĒ EPS, or PDF (Press Ready format) are the best for vector based or mixed type works, using RGB or CMYK system profiles
âĒ Do not forget to save the system icc profile into your image file!
âĒ Please contact us when you use not common file types or softwares.
Find more tips and tricks about preparing your images for printing at Knowledge base.
Storage media:
âĒ Disks: CD, DVD, Blue-Ray
âĒ USB Pen-Drive, Flash memory, SD-Card
âĒ External hard drive with USB 2.0/3.0 ports
Sending files to print, uploading online:
Use the Order feature on our website to send any number of files up to 20GB in total.
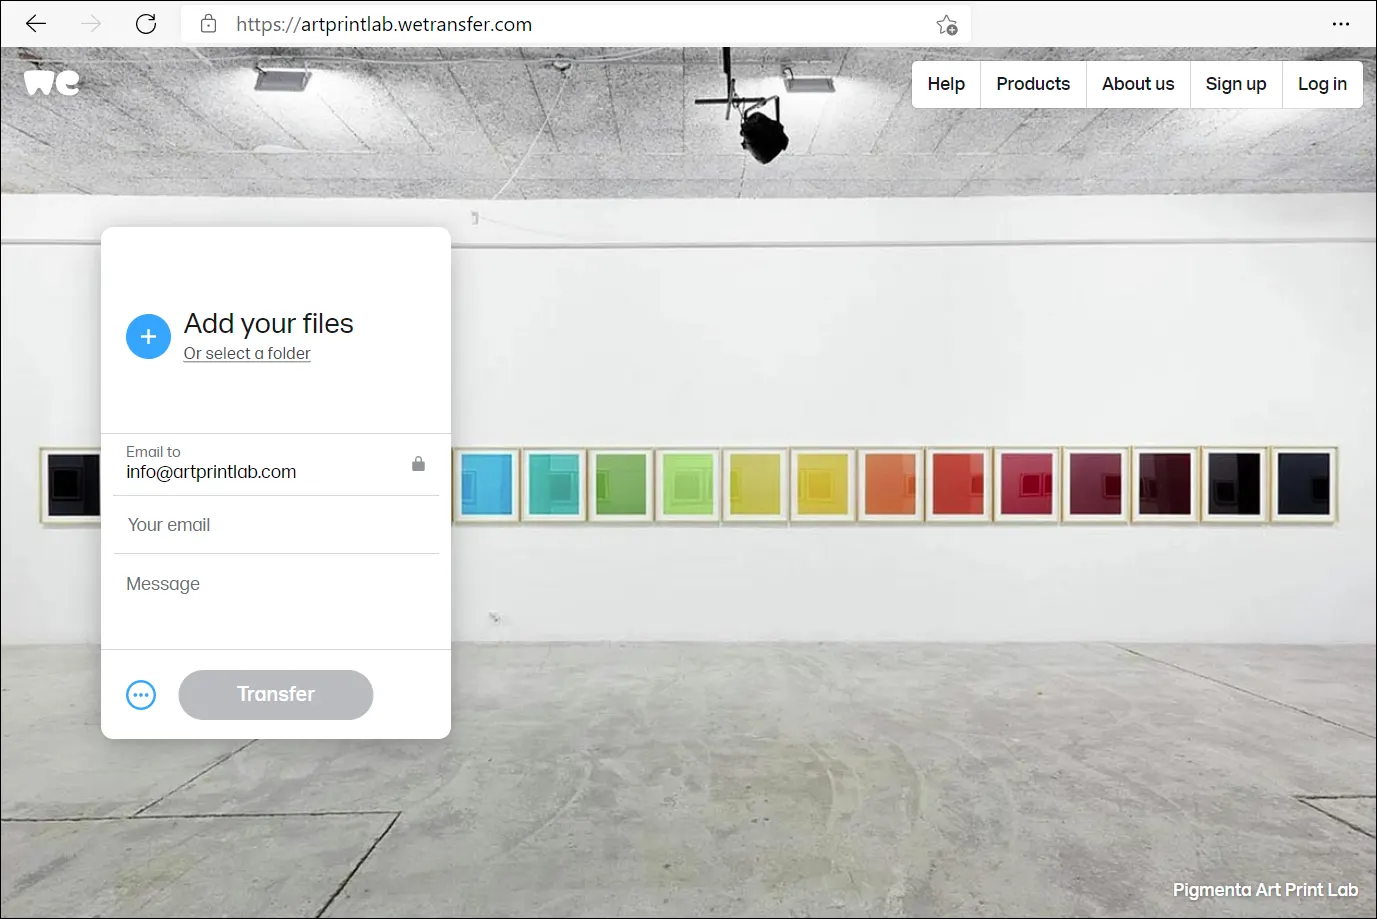
Our advise to use Wetransfer.com large size file transfer system via our account.
Wetransfer.com is one of the most known and trustful online file sending system with a very clean and simple user interface.
âĒ Prepare your files for upload:
It is important, that the name of the files should contain useful information:
âĒ a serial number (01-02-03âĶ)
âĒ the size youâd like that image printed (in cm or mm)
âĒ the number of copies you order from that file
e.g. 01_sunflower_50x70cm_3copies.tif
âĒ Enter to wetransfer.com web page
âĒ After accepting cookies and terms (choose Send a file? on mobile) - drag and drop your files to any part of wetransfer window, or use the + Add your files button to select your files for transfer (step toward with Next button on mobile)
âĒ Write a Message to us with useful information regarding your order or transfer (step toward with Next button on mobile)
âĒ Type in Your email (use the same address as you did in the order form) and start the upload by the Transfer button
âĒ You will receive a security code in email, type in here (there is no boring security check if you register a free account and you sign in)
âĒ Wait until the upload process finishes successfully. Don't close this tab and don't exit your browser until the upload finished successfully!
A confirmation email will be sent to you:
"Your files were sent successfully to info@artprintlab.com"
Another email will inform you shortly that we have your files downloaded:
"info@artprintlab.com downloaded your transfer"
If any of those two emails not received by the end of the next workday please contact us.
 Clean and simple user iterface of Wetransfer.com online file transfering system.
When you plan to send large number of files or to upload images frequently, we provide a permanent or temporary account on our FTP server - ask for access via e-mail.

 HU
HU
